- Open Outlook 2010
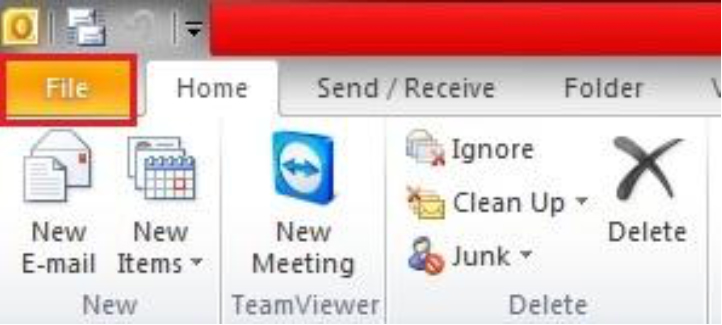
- Click on File up the top left hand corner of your screen
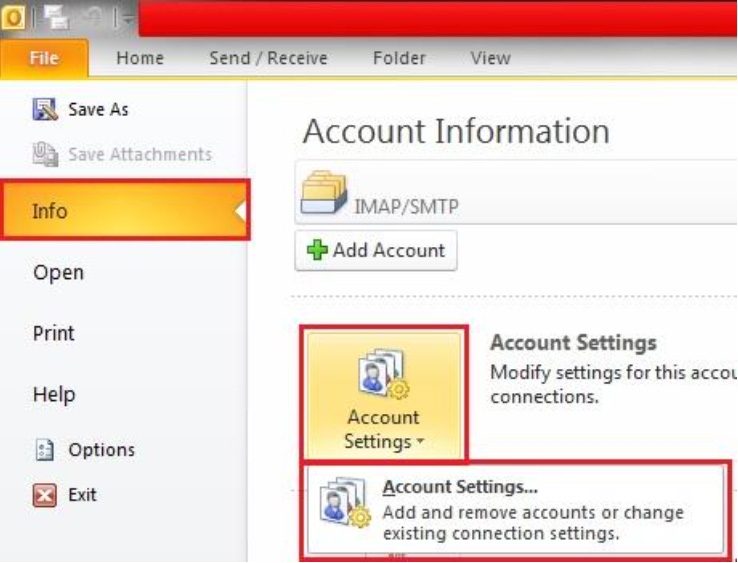
- Under the Info tab – click on,”Account Settings”. A drop down box will appear. Click on the drop down box labelled,”Account Settings.”
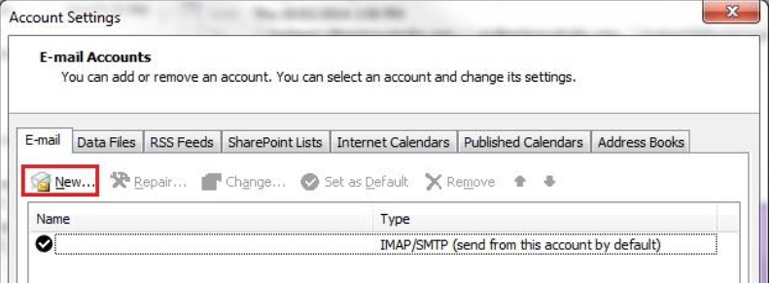
- A window will pop up. Click on, “New.”
- “Add New Account” will now pop up. Leave the Email Account selection as is, and click, “Next.”
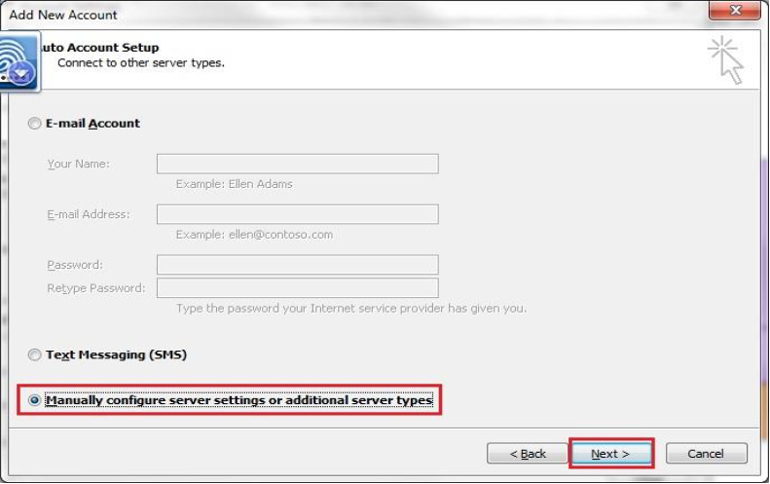
- Auto Account Set up should now be on your screen. Instead of typing information in, select, “Manually Configure Server Settings or Additional Server Types” and click, “Next.”
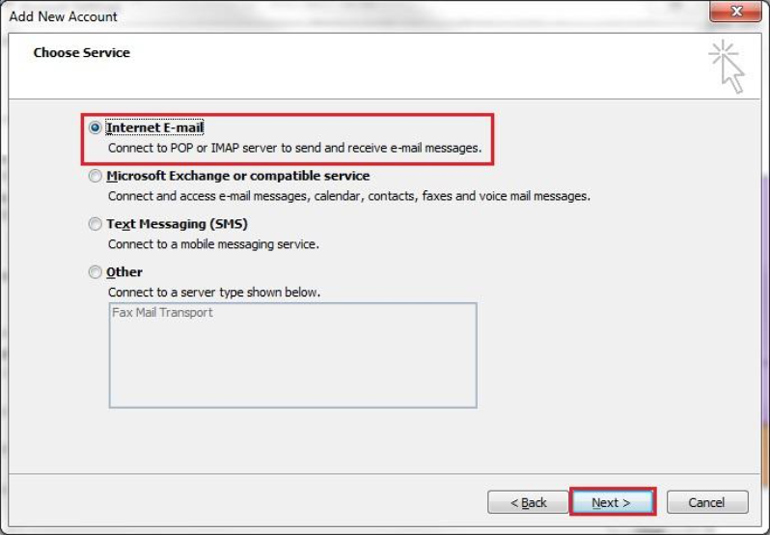
- Now you can choose which service you would like, Internet Email should be automatically selected. Click, “Next.”
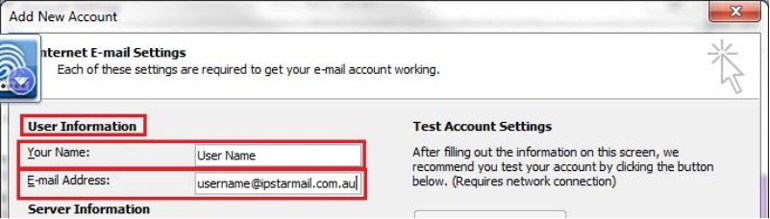
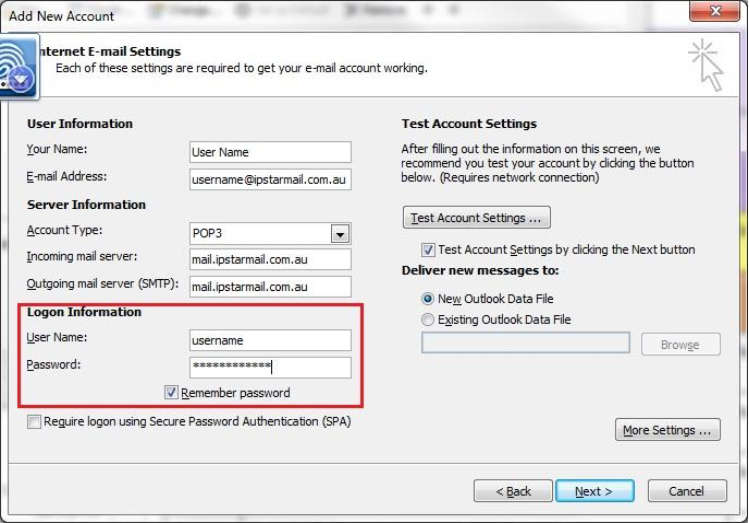
- You will need to enter your User Information. Start by entering your Name, this will be what the recipient will see when email is sent, then enter your email address.
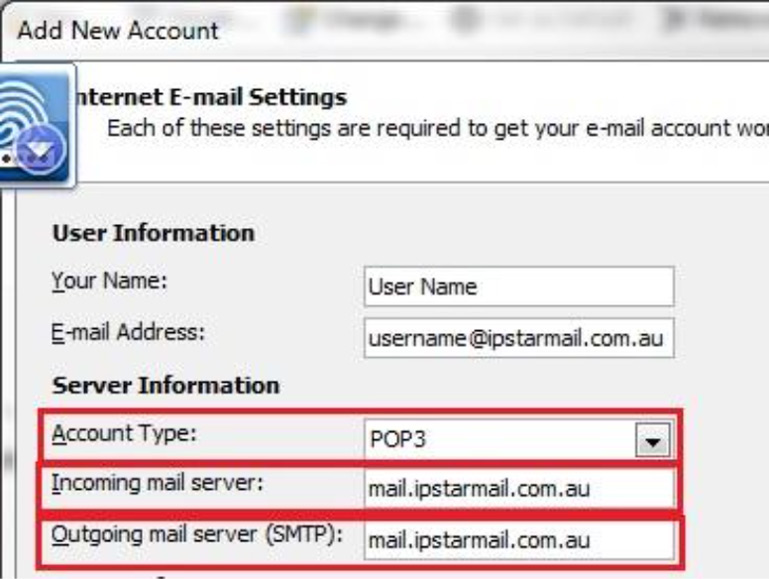
- Enter the Server information next. Leave POP3 selected, and then enter the Incoming Mail Server and Outgoing Mail Server both as mail.ipstarmail.com.au
- Under Logon Information, type in your IPSTARMAIL username and password, tick the remember password box.
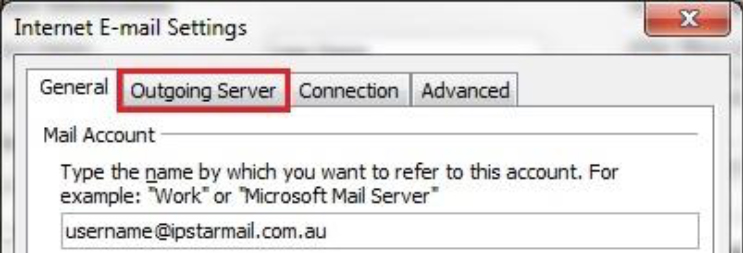
- In the bottom right hand corner of the screen you will see a More Settings button – click on this

- Internet email Settings window will pop up, Click on the Outgoing Server tab
- Click on the, “My Outgoing Server requires Authentication” button, and leave the selection as Use same settings as my incoming mail server. Click on, “okay”, when this is done.

- Next a test will run confirming that you have put everything in correctly, if this is successful, you can click on close and then finish.

Sales: 1300 477 827
Support: 1300 464 778